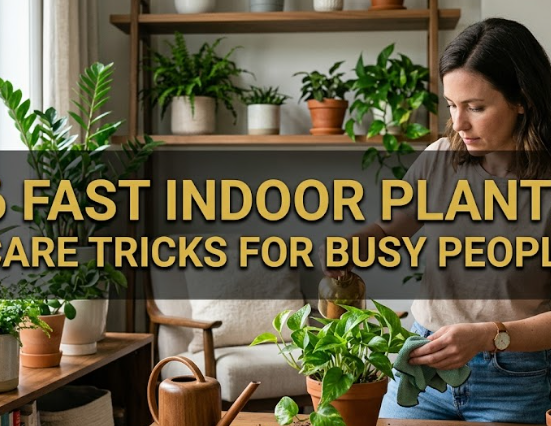
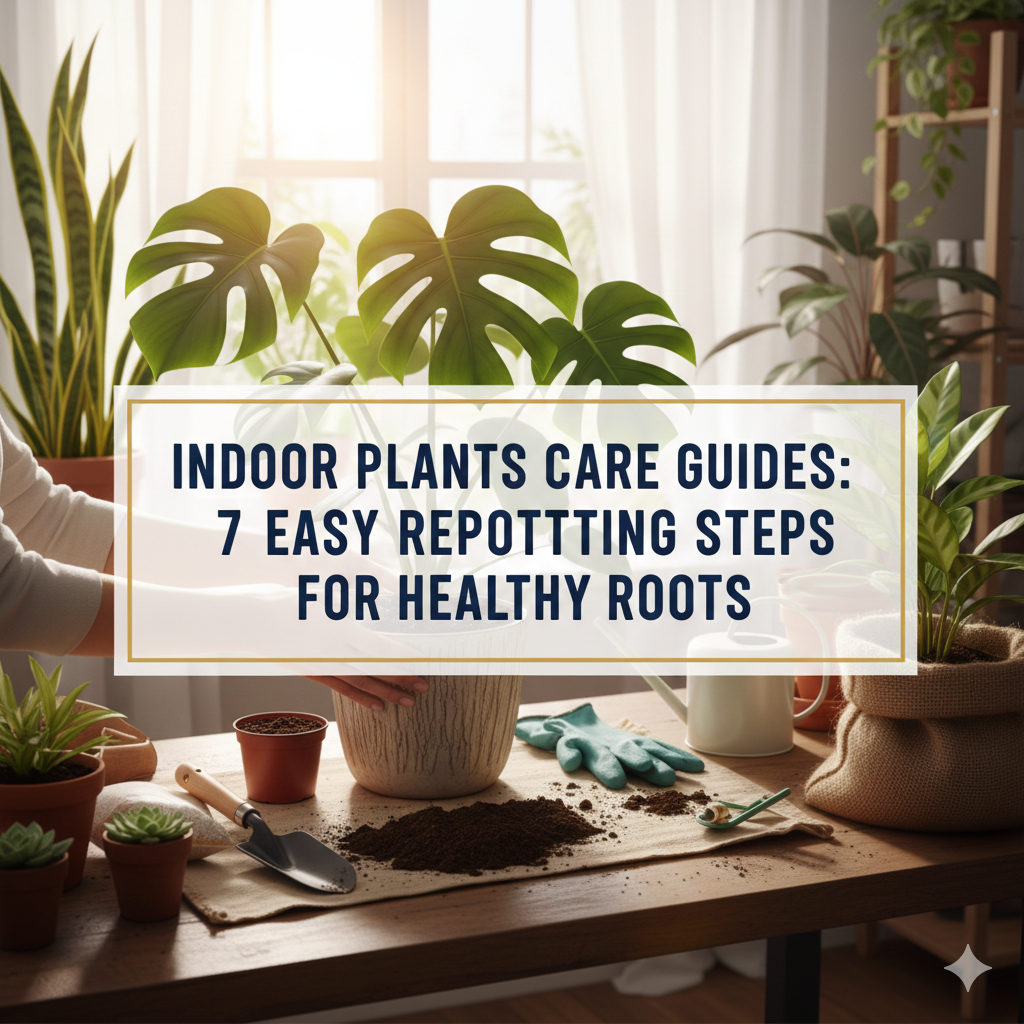
Indoor Plants Care Guides: 7 Easy Repotting Steps for Healthy Roots
Your favorite houseplant has been sitting in the same pot for two years. The roots are sticking out of the drainage holes. The soil dries out quicker than it normally would. The plant appears to be fatigued, crowded, and strained.
Sound familiar?
This is one of the most widespread issues plant owners have to deal with — and the good news is, there is a very easy solution. Repotting.
Repotting provides your plant with a new life. It means transferring your plant to a new home with fresh soil and a bigger space to grow. When properly done, it can turn a failing plant into a thriving one.
Many people are afraid to repot, however. They are afraid of damaging the roots, choosing the wrong soil, or destroying the plant without realizing it. That fear is perfectly natural — but it is not necessary once you know what you are doing.
This indoor plants care guide takes you through 7 simple, clear steps to repot your plants in a stress-free manner. Regardless of whether you are a complete beginner or an experienced grower, this guide covers everything you need.
Let’s dig in.
Why Repotting Is One of the Best Things You Can Do for Your Plant
The majority of people water their plants and make sure they receive adequate sunlight. Yet they do not think about what is going on underground — the root system.
Roots are everything. They absorb water and nutrients. They anchor the plant. They support everything that grows above the soil. When roots run out of space, the whole plant suffers.
Repotting solves that problem. It provides your plant with space to stretch its roots, access fresh nutrients, and breathe well. Think of it like upgrading from a small apartment to a larger one — the plant can now live comfortably.
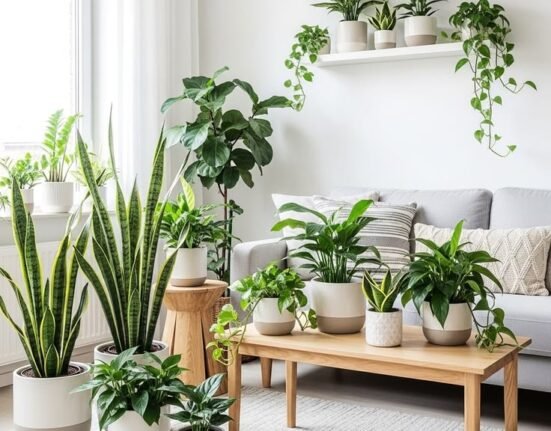
For more tips on keeping your houseplants thriving year-round, visit Indoor Plants Guide — a great resource for beginner and experienced growers alike.
Signs Your Plant Is Screaming for a New Pot
You do not have to guess when it is time to repot. Your plant will show you.
Here are the most common signs to watch for:
| Warning Sign | What It Means |
|---|---|
| Roots growing out of drainage holes | The pot is full to the brim |
| Roots circling the top of the soil | No room left underground |
| Soil dries out within 1–2 days of watering | Roots have replaced most of the soil |
| Plant appears top-heavy or keeps tipping over | Root-to-pot ratio is off |
| Slow or zero new growth during growing season | Plant is root-bound and stressed |
| Yellow leaves with no obvious cause | Nutrient depletion from exhausted soil |
| Water runs straight through the pot | Soil is too compacted or root-bound |
If your plant is showing two or more of these signs, it is time to repot.
The Best Time of Year to Repot Your Houseplants
Timing matters. Repotting at the wrong time can stress your plant even more.
The best window is early spring, just before the growing season begins. Plants are waking up from their winter rest and getting ready to push out new growth. Repotting at this stage gives them the best opportunity to recover quickly and settle into their new pot.
Early fall is an option for certain plants, but avoid repotting during winter. Most houseplants slow down significantly during the cold months, and disturbing the roots when the plant is dormant makes recovery much harder.
Quick Repotting Season Chart
| Season | Good Time to Repot? | Notes |
|---|---|---|
| Early Spring | ✅ Best time | Plant is waking up, growth is starting |
| Late Spring | ✅ Good | Still a solid window |
| Summer | ⚠️ Okay with care | Avoid extreme heat days |
| Early Fall | ⚠️ Possible | Works for some tropical plants |
| Winter | ❌ Avoid | Plant is dormant, slow to recover |
What You Need Before You Start — The Repotting Supply List
Prepare your supplies before you touch a single root. Having everything within reach makes the whole process smooth and less messy.
Here is what you will need:
New pot — One size up from the current one. That normally means 1–2 inches larger in diameter. Going too big is a common mistake that leads to overwatering problems.
Fresh potting mix — Use a mix suitable to your particular plant. Succulents require gritty, fast-draining soil. Tropical plants like pothos or peace lilies prefer something more moisture-retaining.
Watering can — You will need to water the plant before and after repotting.
Small shovel or trowel — Helpful for moving soil around without making a mess.
Gloves — Optional, but smart if you are working with plants that have irritating sap, such as ficus or philodendron.
Old newspaper or a tarp — Lay it down to catch the mess and make cleanup easier.
Scissors or pruning shears — For trimming any dead, rotting, or overly tangled roots.
7 Easy Repotting Steps for Healthy Roots
Now we get to the heart of this indoor plants care guide. Follow these seven steps carefully and your plant will settle into its new home without a problem.
Step 1 — Water Your Plant 24 Hours Before Repotting
This step gets skipped all the time, but it is one of the most important.
Watering your plant the day before repotting softens the soil. That makes it much easier to slide the root ball out of the old pot without tearing or damaging the roots.
A well-hydrated plant also handles the stress of repotting better. Dry roots are fragile and frequently tend to break. Moist roots are flexible and resilient.
Pro tip: Do not soak the plant. A normal thorough watering is all you need. The goal is moist soil, not soggy mud.
Step 2 — Pick the Right New Pot
Choosing the correct pot size is critical. Most beginners make the mistake of going too big because they think more space means faster growth. It does not work that way.
When a pot is too large, the plant cannot drink up all the extra water surrounding its roots. That water stagnates and settles in the soil, creating the perfect conditions for root rot.
The golden rule: Go one pot size up. If your plant is in a 4-inch pot, move it to a 6-inch pot. If it is in a 6-inch pot, move to an 8-inch pot.
Also check for drainage holes. Every good pot needs at least one hole at the bottom. Without drainage, water builds up and the roots suffocate.
Pot Size Reference Guide
| Current Pot Size | Recommended New Size |
|---|---|
| 2–4 inches | 4–6 inches |
| 4–6 inches | 6–8 inches |
| 6–8 inches | 8–10 inches |
| 10–12 inches | 12–14 inches |
| 14+ inches | Add 2 inches max |
Step 3 — Prepare the New Pot with Fresh Soil
Set up the new pot before you remove your plant from the old one.
Add a layer of fresh potting mix to the bottom of the new pot. The amount of soil you add depends on the current height of the plant’s root ball. You want the top of the root ball to sit about an inch below the rim of the new pot. That gap makes watering easier and prevents soil from spilling over.
A loose, well-aerated soil layer at the bottom encourages roots to spread downward naturally once the plant is settled in.
Quick tip: Do not pack the soil down hard at the bottom. Keep it loose so roots can push through easily.
Step 4 — Remove the Plant from Its Old Pot
This is the step that worries most people. But if you watered your plant the day before, it should come out quite smoothly.
Flip the pot gently to the side while supporting the base of the plant with your other hand. Give the bottom of the pot a few light taps. The root ball should slide out on its own.
If it is stuck, run a thin knife or a chopstick around the inside edge of the pot to loosen the soil from the walls. Do not pull hard on the stem — that can cause serious damage.
For very stubborn plants, squeeze the sides of a plastic pot gently to help loosen the grip.
Once the plant is out, pause and examine the root ball. The condition of the roots tells you a lot about plant health.
What to Look for When Examining Roots
| Root Appearance | What It Tells You |
|---|---|
| White or light tan, firm | Healthy and thriving |
| Tightly coiled in a ball | Root-bound, needs more space |
| Brown, mushy, or smelly | Root rot — needs to be trimmed |
| Very thin and sparse | Plant may be underfed or underwatered |
| Growing in circles at the bottom | Pot has been too small for too long |
Step 5 — Loosen the Roots and Trim the Bad Ones
After your plant is out of the pot, gently loosen the root ball with your fingers. Work from the bottom and sides, untangling any roots that have started growing in circles.
Loosening the roots encourages them to spread out into the new soil instead of continuing to grow in the same cramped pattern.
Now look for any roots that are dead, rotten, or damaged. They are normally dark brown or black, feel soft and mushy, and may smell bad. Use clean scissors or pruning shears to cut these off.
Why trim bad roots?
Rotten roots spread disease to healthy roots. Removing them early stops the problem from getting worse and gives the healthy roots more resources to work with.
After trimming, if you want to be extra careful, dust the cut ends lightly with cinnamon. Yes, regular kitchen cinnamon. It acts as a natural antifungal and helps prevent infection at the cut points.
Step 6 — Place the Plant in Its New Pot and Fill with Soil
Now comes the satisfying part.
Lower the plant into the center of the new pot. Make sure it is centered and sitting upright. The top of the root ball should sit about an inch below the rim.
Start filling in the sides with fresh potting mix. Use your fingers or a trowel to work the soil gently into the gaps around the root ball. You want good contact between the roots and the new soil, but avoid packing it in too tightly.
Overly compacted soil blocks airflow, makes drainage worse, and slows root growth. Light and airy is the goal.
Once the pot is filled, tap it lightly on the ground a couple of times to help the soil settle naturally into any air pockets. Add a bit more soil if needed, but keep that inch of space at the top.
What NOT to do:
Do not add gravel or stones to the bottom of the pot before adding soil. This is a popular myth. Research has shown it actually makes drainage worse, not better, by creating a perched water table that keeps the lower soil wetter for longer. According to the University of Illinois Extension, proper drainage depends on the right soil mix — not added layers at the bottom.
Step 7 — Water Thoroughly and Find the Right Spot
You are almost done. The final step is giving your newly repotted plant a good, thorough watering.
Water slowly and evenly until it starts running out of the drainage holes. This settles the soil, closes any remaining air pockets, and gives the roots their first drink in their new home.
After watering, place your plant somewhere with bright indirect light. Avoid putting it in direct harsh sunlight right away. The plant is recovering from the stress of repotting and does not need the extra pressure of intense light while it is adjusting.
For the next two to four weeks, keep a close eye on your plant. Some wilting or drooping in the first few days is normal. The plant is redistributing energy underground to establish new roots.
Hold off on fertilizing for at least four to six weeks after repotting. Fresh potting mix already contains nutrients. Adding fertilizer too soon can burn the sensitive new roots.
Taking Care of Your Plant Right After Repotting
The week after repotting is a delicate time. Here is a simple care checklist to help your plant bounce back fast.
| Care Task | What to Do |
|---|---|
| Watering | Water only when the top inch of soil feels dry |
| Light | Bright indirect light, no harsh direct sun |
| Fertilizing | Skip for 4–6 weeks |
| Humidity | Mist leaves lightly if plant is tropical |
| Temperature | Keep away from cold drafts or AC vents |
| Moving the plant | Keep it in one stable spot while it adjusts |
Common Repotting Mistakes and How to Avoid Them
Even experienced plant owners get this wrong sometimes. Here are the most common errors and exactly what to do instead.
Going Too Big with the New Pot
Jumping from a 4-inch to a 10-inch pot feels like giving your plant a mansion. But it creates a waterlogging problem that is hard to fix. Stick to one size up.
Repotting During Winter
Most houseplants rest during winter. Disturbing the roots during this period slows recovery significantly. Wait for spring.
Not Checking for Root Rot
Skipping the inspection of roots before placing the plant in fresh soil may result in sealing rotten roots inside a new pot. Always inspect and trim before repotting.
Using the Wrong Soil
A cactus in regular potting mix will most likely be overwatered and rot. A fern in cactus mix will dry out and die. Match the soil to the plant’s specific needs.
Fertilizing Too Soon After Repotting
Fresh soil already contains nutrients. Adding more fertilizer right away can chemically burn the delicate new root growth. Be patient and wait at least one month.
Repotting Different Types of Indoor Plants — Quick Reference
Not every plant is the same. Here is a quick guide to repotting some of the most popular houseplants.
| Plant Type | How Often to Repot | Special Notes |
|---|---|---|
| Pothos | Every 1–2 years | Very forgiving, easy to repot |
| Snake Plant | Every 2–3 years | Prefers to be slightly root-bound |
| Peace Lily | Every 1–2 years | Repot when roots crowd the top |
| Monstera | Every 1–2 years | Needs a sturdy, heavy pot |
| Succulents | Every 2 years | Use well-draining cactus mix |
| Orchids | Every 1–2 years | Use bark-based orchid mix only |
| Rubber Plant | Every 1–2 years | Wear gloves — sap can irritate skin |
| ZZ Plant | Every 2–3 years | Very slow grower, patient repotting needed |
FAQs About Repotting Indoor Plants
Q: How do I know if my plant needs a bigger pot or just fresh soil?
When the roots are escaping out of the drainage holes or going around the top, your plant needs a bigger pot. When the soil only appears old and depleted but roots are not yet overcrowded, you can do a top dressing — remove the top layer of soil and replace it with fresh mix — without repotting entirely.
Q: Can I repot a flowering plant?
It is better to wait until after the blooming period ends. Repotting a plant during its blooming period stresses it out and more often than not causes flowers to drop early.
Q: What happens if I do not repot my plant when it needs it?
Over time, a root-bound plant will stop growing, lose color, and weaken significantly. The soil depletes of nutrients and the plant becomes more vulnerable to pests and disease.
Q: Should I remove all the old soil from the roots when repotting?
Not necessarily. Gently shake off loose old soil and loosen the root ball, but you do not need to wash every bit of soil away. Removing too much at once can shock the plant.
Q: My plant looks sad and droopy after repotting. Is it dying?
Probably not. Transplant shock is completely normal. Most plants droop for a few days after repotting while they adjust to the change. Keep the soil lightly moist, avoid harsh light, and give it a week or two before worrying.
Q: Can I reuse the old potting soil?
Old soil is depleted of nutrients and may contain pests or disease. It is better to use fresh potting mix when repotting. You can compost the old soil if you have a compost setup.
Q: How often should I repot my indoor plants?
Most indoor plants do well with repotting every one to two years. Slow growers like ZZ plants and snake plants may only need it every two to three years. Always let the plant guide you — watch for the signs rather than following a strict schedule.
Tying It All Together — Give Your Plant the Home It Deserves
Repotting is not complicated. Once you break it down into clear steps, it becomes one of the most rewarding things you can do as a plant owner.
You are not just moving a plant from one container to another. You are making an investment in its long-term health. You are giving roots room to breathe, fresh nutrients to absorb, and a stable foundation to support years of new growth.
This indoor plants care guide has walked you through every part of the process — from reading the warning signs, to choosing the right pot, to caring for your plant in the days that follow. Seven steps. That is all it takes.
So the next time your plant starts looking cramped or tired, do not ignore it. Grab a bigger pot, some fresh soil, and give those roots the space they have been asking for.
Your plant will thank you — with greener leaves, stronger stems, and growth that makes you truly proud.