Indoor Plants Care Guide: 8 Secret Tricks to Stop the Death of Plants
Have you ever taken home a beautiful plant, and then seen it grow yellow and hang, and dry up? You’re not alone. House plants are a problem faced by millions of people. The fact is, the majority of plant deaths are not accidents — they are the results of a few very frequent (and very correctable) errors.
This is a guide that has simplified all this. No fancy science talk. No baffling botanical names. Just real tricks that actually work.
Let’s dig in.
The Reason Why Most Houseplants Do Not Live Through the First Year
Here’s an interesting fact: most houseplants do not die because they are neglected, but because their owners show too much love. People over-water, change the locations of plants too frequently, or put them in an inappropriate location. The plant gets baffled, stressed, and gives out.
The good news? It is not so hard to fix what is actually killing your plants once you know what it is.
Let us discuss the most widespread plant killers first before we enter into the 8 secret tricks:
| Common Mistake | What It Does to the Plant |
|---|---|
| Overwatering | Causes root rot, prevents oxygen from reaching roots |
| Too little light | Retards growth, leads to yellowing |
| Wrong pot size | Retains too much moisture or dries roots too quickly |
| Ignoring humidity | Causes brown and crispy leaf ends |
| Using tap water | Fluoride and chlorine can damage sensitive plants |
| Repotting too often | Stresses roots, causes shock |
| Skipping fertilizer | Causes the plant to starve of essential nutrients |
| Placing near drafts | Brings about temperature stress |
Now we shall correct each of these — one secret at a time.
Secret Trick #1: Your Finger Knows Better Than Any App
Everyone discusses watering schedules. “Water every 3 days.” “Water once a week.” Here’s the truth about those schedules — they are almost useless.
Why? Because no two homes are alike. The apartment you live in could be drier than your neighbor’s apartment. Your plant pot may drain more quickly than mine. A fixed schedule does not take all of that into account.
The Finger Test (And Why It Works)
Insert your finger approximately one inch into the soil. Water the plant if it feels dry. If it still feels moist or cool, leave it alone.
This simple trick prevents both overwatering and underwatering. It takes two seconds. It costs nothing. And it is more precise than any app or moisture meter available.
For succulents and cacti, go even further — two inches deep — before watering.
For tropical plants such as pothos or peace lily, water once the top inch is dry.
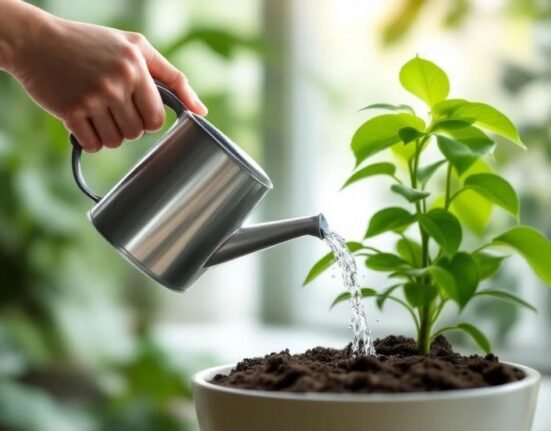
Bottom Watering: The Secret Most Beginners Miss
Rather than pouring water on top of the soil, place your pot in a tray of water and leave it there for 20–30 minutes. The soil absorbs water from the bottom. This stimulates root growth downward (making the plant stronger) and prevents water from sitting on leaves (which causes rot and mold).
Try it once. You’ll never go back.

Secret Trick #2: Light Is Food — Stop Storing Plants in Dark Corners
Plants use light to produce their own food. It’s called photosynthesis. When there is not sufficient light, your plant will literally begin to starve.
The issue is that the majority of people have the illusion that their home is brighter than it actually is. What seems to be a well-lit room to the human eye may not be bright enough for a sun-loving plant.
How to Read Light in Your Home
Here is the easiest method to figure out your light situation:
Bright direct light: The sun shines directly on the spot for several hours. Best for succulents, cacti, and most herbs.
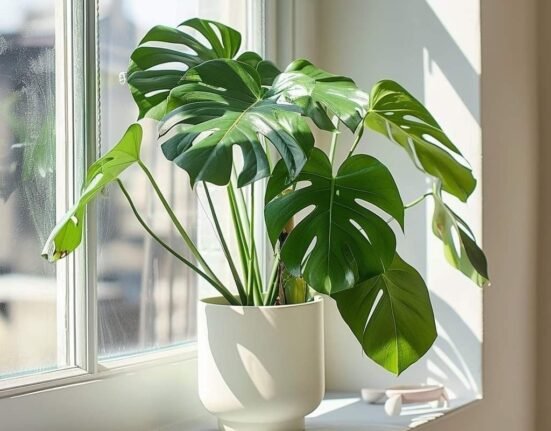
Bright indirect light: Near a window but the sun does not hit the plant directly. Best for pothos, monstera, fiddle leaf figs, and snake plants.
Low light: Far from windows, or in a room with small windows. Best for ZZ plants, cast iron plants, and peace lilies.
| Plant | Light It Needs | Best Window Direction |
|---|---|---|
| Pothos | Low to bright indirect | North or East |
| Snake Plant | Low to indirect | Any |
| Fiddle Leaf Fig | Bright indirect | East or West |
| Succulents | Bright direct | South or West |
| Peace Lily | Low to medium indirect | North |
| Monstera | Bright indirect | East or West |
The Leaf Color Trick
When the leaves of your plant are turning pale green or yellow and the plant is growing slowly, it is not receiving enough light. Move it closer to a window.
When the leaves are washed out, bleached, or have dry brown patches, it is receiving too much direct sunlight. Either move it back or cover it with a sheer curtain to filter the light.
Secret Trick #3: The Pot Is Just as Important as the Plant
Here is something that most beginner plant parents do not think about: the pot you choose can be the difference between a thriving plant and a dead one.
For in-depth plant-by-plant advice, you can explore more detailed care tips at Indoor Plants Guide — a helpful resource for both beginners and experienced plant parents.
Drainage Holes Are Non-Negotiable
If your pot does not have a drainage hole at the bottom, excess water has nowhere to go. It just sits there. The roots lie in water, run out of oxygen, and begin to rot.
Always use pots with drainage holes. If you love the look of a decorative pot without a hole, simply place a plastic nursery pot inside it. Problem solved.
Pot Size Matters More Than You Think
Too big a pot = too much soil = too much moisture = root rot.
Too small a pot = cramped roots = stressed plant = slow growth or death.
A good rule of thumb: when repotting, go up only one pot size (about 1–2 inches larger in diameter). Never jump from a small pot to a huge one.
Terracotta vs. Plastic vs. Ceramic
| Pot Type | Pros | Cons | Best For |
|---|---|---|---|
| Terracotta | Breathable, dries quickly | Breaks easily, dries too fast in dry climates | Succulents, cacti, Mediterranean herbs |
| Plastic | Lightweight, retains moisture | Less breathable, looks cheap | Tropical plants, ferns |
| Ceramic/Glazed | Pretty, retains moisture | Heavy, less breathable | Most houseplants |
Secret Trick #4: Humidity Is the Hidden Killer Nobody Talks About
The leaves of your plant may be browning at the tips. You might think it needs more water. Low humidity is, however, the actual cause very often.
The majority of tropical houseplants originally come from rainforests where the air is warm and moist. Your home — especially in winter when heating systems are running — can be very dry. That dry air pulls moisture right out of the leaves.
4 Easy Ways to Raise Humidity Around Your Plants
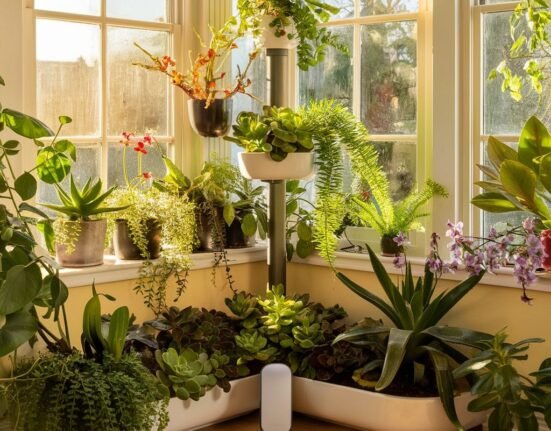
Group your plants together. Plants release moisture naturally through their leaves. When you cluster them together, they create a tiny, more humid microclimate for each other.
Use a pebble tray. Fill a shallow tray with pebbles and water. Place your plant pot on top of the pebbles (above the waterline, not sitting in water). As the water evaporates, it adds humidity around the plant.
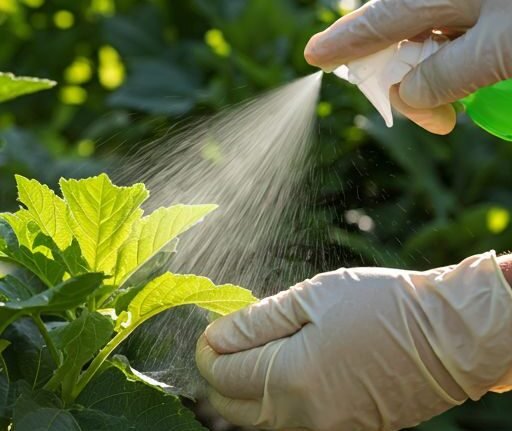
Mist the leaves. Spray leaves lightly using a small spray bottle in the morning. Do not over-mist — too much moisture on the leaves can cause mold.
Buy a small humidifier. If you have a good number of tropical plants, a small humidifier near your plant collection works wonders, particularly during winter.
Which Plants Need the Most Humidity?
Calatheas, ferns, orchids, air plants, and peace lilies all prefer high humidity. Snake plants, ZZ plants, and succulents are completely fine with dry air.
Secret Trick #5: Feed Your Plants (But Don’t Overfeed Them)
Soil does not last forever. Over time, the nutrients in your potting mix are used up or washed away. Fertilizing replaces those nutrients and keeps your plant healthy and growing.
But here is where people go wrong — they over-fertilize. Too much fertilizer burns the roots and causes brown leaf tips and yellowing, the same symptoms as many other problems.
According to the Royal Horticultural Society, feeding houseplants with the right nutrients at the right time is one of the most overlooked aspects of indoor plant care.
The Simple Fertilizing Schedule That Works
During spring and summer (growing season), fertilize once a month using a balanced liquid fertilizer diluted to half strength. That’s it.
Most houseplants slow down or go dormant during fall and winter. Stop fertilizing, or fertilize only once every 6–8 weeks if your plant is still actively growing.
| Plant Type | Fertilize How Often | Best Fertilizer Type |
|---|---|---|
| Foliage plants (pothos, monstera) | Monthly in spring/summer | Balanced (10-10-10) |
| Flowering plants | Every 2 weeks during bloom season | High phosphorus |
| Succulents & cacti | Once in spring, once in summer | Low nitrogen, cactus mix |
| Ferns | Monthly during growing season | Diluted balanced liquid |
Signs You’ve Over-Fertilized
Brown, crispy leaf edges. White crusty buildup on the soil surface. Wilting even after watering. If you notice these signs, flush the soil by running large amounts of water through it for several minutes to wash out excess salts.
Secret Trick #6: Learn to Read Your Plant Like a Book
Plants talk. Not with words, but with their leaves, stems, and roots. Once you learn what different signs mean, you can catch problems early — before they kill your plant.
The Most Common Plant Warning Signs Decoded
Yellow leaves: Usually caused by overwatering or lack of nutrients. Check whether the soil is staying too wet.
Brown leaf tips: Low humidity or too much fertilizer. Both dry air and salt buildup cause this.
Drooping or wilting: Either too dry (needs water) or too wet (root rot). Check the soil with your finger to figure out which.
Leggy, stretched growth: Not enough light. The plant is reaching toward the nearest light source.
White powdery coating on leaves: Powdery mildew — a fungal issue. Improve air circulation and reduce leaf moisture.
Tiny webs on leaves: Spider mites. Very common and treatable with neem oil or insecticidal soap.
Sticky leaves or black sooty coating: Scale insects or aphids leaving behind honeydew. Wipe leaves with a damp cloth and treat with neem oil.
Do a Monthly Plant Check
Set a reminder once a month to look closely at your plants. Check under the leaves, look at the soil surface, and gently wiggle the plant to check if it needs repotting. Early detection saves lives — plant lives, at least.
Secret Trick #7: Temperature and Airflow Can Silently Kill Your Plant
Most houseplants can tolerate the same temperatures as humans — approximately 60°F to 80°F (15°C to 27°C). However, there are sneaky temperature traps lurking in most homes that you may not even notice.
Watch Out for These Hidden Temperature Dangers
Heating and AC vents: Hot or cold air blasting directly on a plant dries it out fast and causes stress. Move plants away from vents.
Cold window glass in winter: Touching a cold window pane can cause frost damage even if your room is warm. Keep plants a few inches away from the glass.
Drafty doorways: If your plant is near a front door that opens to cold air in winter, it will experience temperature shock every time someone walks in.
Radiators: Plants placed directly on or near radiators will dry out extremely quickly.
Air Circulation Matters Too
Stagnant air encourages fungal growth and pests. A gentle fan running nearby (not blowing directly on plants) helps improve airflow. It also helps strengthen stems as plants naturally respond to gentle movement.
Secret Trick #8: Repot at the Right Time — Not Too Early, Not Too Late
Repotting is stressful for plants. You are disturbing their root system, moving them into a new environment, and asking them to adjust. Done at the wrong time, it can set a plant back weeks or even kill it.
Signs Your Plant Actually Needs Repotting
Roots growing out of drainage holes. Roots circling tightly inside the pot (root bound). Soil drying out extremely quickly after watering. Plant has stopped growing despite good care. Plant is top-heavy and keeps tipping over.
Signs Your Plant Does NOT Need Repotting Yet
It’s thriving. It’s currently blooming. It was repotted within the last 6–12 months. It’s winter (wait for spring).
The Best Time and Method
Spring is the ideal time to repot. Plants are entering their growing season and bounce back much faster.
When you repot, gently loosen the root ball, remove as much old soil as you can, trim any dead or mushy roots, place in a slightly larger pot with fresh potting mix, water thoroughly, and put it back in its usual spot. Do not fertilize for at least 4–6 weeks after repotting — the roots need time to settle.
Quick Reference: The 8 Secret Tricks at a Glance
| # | Secret Trick | Key Takeaway |
|---|---|---|
| 1 | Finger test + bottom watering | Ditch watering schedules |
| 2 | Match light to plant needs | Light is food — don’t starve your plant |
| 3 | Pick the right pot with drainage | Pot size and drainage holes save lives |
| 4 | Manage humidity | Dry air kills tropical plants silently |
| 5 | Fertilize correctly | Feed monthly in growing season, less in winter |
| 6 | Read plant warning signs | Catch problems early before they turn fatal |
| 7 | Avoid temperature traps | Keep plants away from vents, drafts, and cold glass |
| 8 | Repot at the right time | Only repot when needed, always in spring |

The Bonus Tip Most Plant Guides Leave Out
Here is something that does not get talked about enough — start with easy plants.
A fiddle leaf fig or a calathea is not a good plant to start with, especially if you are a first-timer. These are notoriously picky and even highly experienced plant parents have a hard time with them.
Begin with a pothos, snake plant, ZZ plant, or spider plant. They are tolerant, adaptable, and almost impossible to kill. Once you gain confidence with these, move on to the more challenging plants.
All experienced plant parents began with dead plants. It is a component of the learning curve. The aim is not to never make mistakes — it is to make them on plants that can absorb them.
Frequently Asked Questions (FAQs)
Q: How do I know whether or not I am overwatering my plant? A: The yellowing of leaves, soggy soil, and a musty odour from the pot are the most widespread signs. Always check your soil with your finger before watering. Wait another day or two if it still feels moist.
Q: Can a dying plant be saved? A: In many cases, yes. When you spot the issue early enough, your struggling plant can be brought back to life by adjusting your watering, moving it to better light, or trimming dead roots. The sooner you act, the better.
Q: How frequently should I clean the leaves of my plant? A: Every few weeks is ideal. Dusty leaves block light absorption and make it harder for plants to photosynthesize. Simply wipe them with a soft, damp cloth.
Q: Is tap water safe for all plants? A: Tap water works for most plants. However, delicate plants such as peace lilies, spider plants, and calatheas can react to fluoride and chlorine in tap water. Let tap water sit uncovered overnight before using it, or use filtered water.
Q: Why are my plant’s leaves turning yellow even though I water it regularly? A: Regular watering can actually be the problem. “Regular” often means too much. Yellow leaves are one of the first signs of overwatering. Cut back on watering and make sure your pot has good drainage.
Q: Do indoor plants need fertilizer in winter? A: Most don’t. In winter, most houseplants grow much slower or stop growing entirely. Fertilizing during this time can build up salts in the soil and damage roots. Wait until spring to resume feeding.
Q: What is the simplest indoor plant for beginners? A: Pothos, snake plants, and ZZ plants are the top three picks for beginners. They tolerate low light, irregular watering, and dry air far better than most other houseplants.
Q: Can I put any plant near a window? A: Not necessarily. North-facing windows provide low, indirect light suitable for shade-tolerant plants. South-facing windows can be very bright and may burn sensitive plants unless filtered with a curtain. Match the plant to the window’s light level.
Wrapping It Up: Keep It Simple, Keep It Consistent
There is no need to complicate the care of indoor plants. Most of the time, plants die because of a handful of easy-to-fix mistakes: too much water, too little light, the wrong pot, or ignoring what the plant is trying to tell you.
These 8 secret tricks in this indoor plants care guide are not magic. They are simply good habits that any plant parent can build over time. Start small. Pay attention. Adjust when something is not working.
Your plants will reward you — with rich leaves, new growth, and perhaps even a flower here and there.
Now go check on your plants. Your finger is waiting.