Indoor Plants Care Guides: 4 Easy Drainage Pro Tips That Rescue Roots
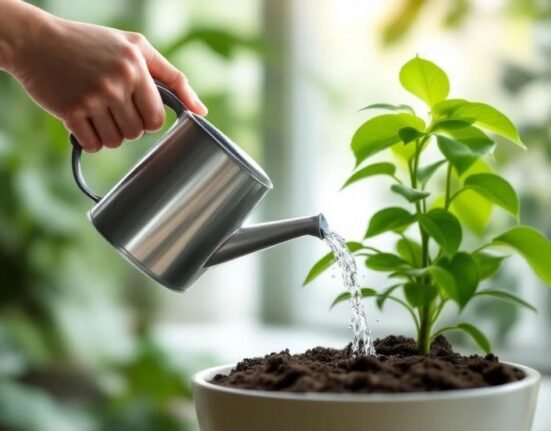
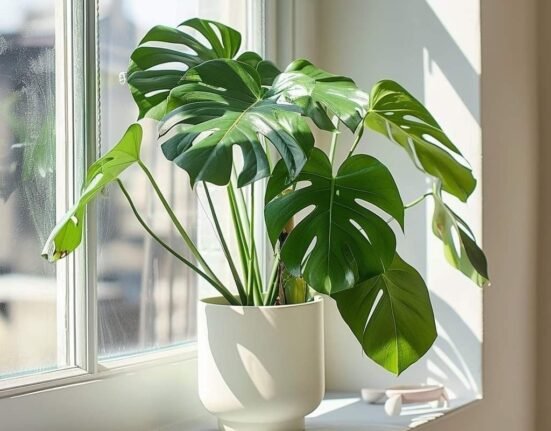
You water your plant. It looks happy for a day or two. The next thing is that the leaves begin to turn yellow. The stems go soft. And before you know it, your favorite houseplant is dying — and you do not know why.
And the point most people overlook here is this: the water is not the problem. It’s where the water goes.
The roots are suffocated when water sits at the bottom of a pot with nowhere to drain. Roots need both water and air. Excess moisture and lack of air = root rot. And root rot is among the leading causes of houseplant mortality.
The good news? You do not have to spend money on expensive tools or even be a gardener to fix this. These indoor plants care guides will take you through 4 easy drainage tricks that actually work. This is the guide for you whether you are a complete beginner or someone who has killed one or two too many succulents.
Let’s dig in.
Why Drainage Is the Secret Ingredient Nobody Talks About
Most plant care recommendations center on water and light. Those things matter, yes. However, drainage is the unspoken hero — or villain — behind every healthy or sickly houseplant.
The pot of your plant can be pictured like a bathtub. When there is a block in the drain, water simply stagnates. The roots of your plant end up submerged in stagnant water that cuts off oxygen and creates the most optimal environment for destructive bacteria and fungi to grow.
What Happens When Roots Sit in Water Too Long
Root rot sets in fast. Here is what the process looks like:
| Timeline | What’s Happening |
|---|---|
| Day 1–2 | Roots begin to lose oxygen |
| Day 3–5 | Bacteria and fungi start damaging root tissue |
| Week 1–2 | Roots become brown, mushy, and begin to die |
| Week 2–3 | Leaves turn yellow, stems become soft, plant wilts |
| Week 3+ | Full plant collapse if untreated |
That is why good drainage is no longer optional. It forms the basis of ensuring that any indoor plant stays alive and healthy.
Signs Your Plant Has a Drainage Problem Right Now
You should check whether your plant is already struggling before diving into the hacks. Watch out for:
- Yellowing leaves not caused by lack of light
- Soggy soil that takes over a week to dry out after being watered
- A rotten or musty odor coming from the pot
- Brown, mushy roots when you pull the plant out
- Mold or white crust forming on top of the soil
When you are observing two or more of these symptoms, your plant has inadequate drainage — and the time to fix it is now.
Hack #1 — The Gravel Layer Trick (And Why You Might Be Doing It Wrong)
You might have heard that putting rocks or gravel at the bottom of a pot helps drainage. It is one of the oldest plant tips on the planet. But here is the thing — it can only work when done right.
The common mistake? Dumping a thick layer of large rocks and calling it done. This can actually make things worse by creating a “perched water table” — a pool of trapped moisture just above the rocks.
How to Do the Gravel Layer the Right Way
The trick is using the right materials and the right amount.
What you’ll need:
- Fine gravel or pea gravel (not large decorative stones)
- A pot with at least one drainage hole
- Well-draining potting mix
Steps:
- Add a thin layer of fine gravel — about half an inch to one inch — at the very bottom of the pot.
- Place a small piece of mesh screen or a coffee filter over the gravel. This prevents soil from falling through while still letting water pass.
- Add your potting mix on top. Don’t pack it too tight.
- Plant your plant, water it, and watch how fast the water drains out of the bottom.
The mesh or filter is the game-changer here. Most people skip it. Don’t skip it.
Best Gravel Types for Indoor Pots
| Gravel Type | Drainage Level | Best For |
|---|---|---|
| Pea gravel | Good | Most houseplants |
| Horticultural grit | Excellent | Succulents, cacti |
| Lava rocks (crushed) | Excellent | Tropical plants |
| Large decorative stones | Poor | Decoration only |
Use finer materials in the base layer. Save the chunky rocks for decoration on top of the soil if you like the look.
Hack #2 — The Pot-in-a-Pot Method for Plants Without Drainage Holes
Let’s be real. Some pots are just too beautiful to give up. Ceramic pots, decorative baskets, hand-painted containers — they don’t always come with drainage holes, but we love them anyway.
The pot-in-a-pot method solves this without any drilling or damage.
How This Method Works
Instead of planting directly into your pretty pot, you plant into a plain plastic nursery pot that has drainage holes. Then you set that pot inside your decorative outer pot.
When you water, excess water drains out of the inner pot and collects in the outer pot. You empty the outer pot every time it fills up.
Simple. Effective. No ruined pots.
Setting It Up Correctly
What you’ll need:
- A plastic nursery pot (with drainage holes) that fits inside your decorative pot
- Your decorative outer pot
- Small stones or a cork mat to elevate the inner pot slightly
Steps:
- Place a small layer of stones at the bottom of the outer pot to raise the inner pot slightly. This prevents the inner pot from sitting in collected water.
- Set your planted inner pot on top of the stones.
- Water your plant normally.
- Wait 30 minutes after watering, then check the outer pot for standing water. Empty it out.
The elevation step is very important. If the inner pot sits directly in collected water, you are back to the same root rot problem.
Pro Tip: How Often to Check the Outer Pot
| Plant Type | How Often to Empty Outer Pot |
|---|---|
| Succulents & Cacti | Every watering session |
| Tropical plants | Every 1–2 days after watering |
| Ferns & moisture lovers | Every 2–3 days |
| Orchids | After every watering |
Do not allow water to remain in the outer pot longer than two days. It defeats the whole purpose.
Hack #3 — Soil Mixing: The Inside-Out Hack
This is a drainage trick that most indoor plant care guides skip right over — and it is one of the most powerful ones on this list.
The greatest drainage issue is often the soil itself. Standard potting mix holds a lot of moisture. That suits some plants well, but is a nightmare for others. If you are using the same soil for your cactus and your fern, someone is going to suffer.
The fix? Mix your own custom soil blend that matches what your plant actually needs.
The Basic Drainage-Boosting Soil Recipe
This simple mixture works well for most houseplants that struggle with overwatering:
- 60% regular potting mix — provides structure and nutrients
- 20% perlite — enhances aeration and drainage
- 20% coarse sand or horticultural grit — helps water move through faster
Perlite is the white, popcorn-like material you sometimes see in potting mix. It is lightweight and full of tiny air pockets. It does not retain water — it lets water pass through while keeping air around the roots.
For a deeper dive into how different soil amendments affect plant health, the Royal Horticultural Society’s guide on potting composts is an excellent reference.
Soil Mixes by Plant Type
| Plant Type | Recommended Soil Mix |
|---|---|
| Succulents & Cacti | 50% gritty mix + 50% perlite |
| Tropical plants (Monstera, Pothos) | 60% potting mix + 30% perlite + 10% bark |
| Ferns & Calathea | 70% potting mix + 20% perlite + 10% coconut coir |
| Orchids | 80% bark + 10% perlite + 10% charcoal |
| Snake Plants | 50% potting mix + 50% perlite or grit |
These aren’t set in stone. But they are a great starting point. The goal is a mix that holds enough moisture for your plant to drink — but dries out fast enough to avoid rot.
Signs Your Soil Mix Is Too Dense
- Water sits on top of the soil and takes a long time to soak in
- Soil stays wet more than 7–10 days after watering
- Roots look crowded, pale, or mushy when repotting
- Fungus gnats keep appearing (they love wet, dense soil)
When you notice any of these, it is time to repot with a better mixture. Don’t wait.
Hack #4 — The Chopstick Test and Scheduled Watering Reset
This hack is a little different. It is not about making physical changes to your pot or soil — it is about changing how you think about watering.
A huge portion of root rot comes from one simple habit: watering on a fixed schedule. People water every Sunday, no matter what. But plants do not care what day it is. They care whether the soil is actually dry.
The chopstick test is one of the simplest methods of checking soil moisture without any gadgets.
How the Chopstick Test Works
Take a wooden chopstick (or a wooden skewer or pencil) and push it about 2 inches deep into the soil. Leave it for a few seconds, then pull it out.
- Clean and dry? Time to water.
- Slightly damp or has soil sticking to it? Wait another day or two.
- Wet and dark? Definitely don’t water. Come back in 3–5 days.
It’s that simple. This one habit can cut your root rot risk in half.
Building a Smarter Watering Routine
Instead of “water every 7 days,” switch to a check-first system:
| Step | Action |
|---|---|
| Every 2–3 days | Do the chopstick test |
| Soil is dry 2 inches down | Water thoroughly until it drains from the bottom |
| Soil still moist | Skip watering, check again in 2 days |
| Water draining slowly | Check drainage setup, consider repotting |
The goal is to water deeply but infrequently. When you do water, water until it runs out of the bottom of the pot. This flushes the soil and ensures the entire root system gets moisture.
The Watering Mistake That Kills More Plants Than Anything Else
Light, frequent watering is the enemy. It keeps the top of the soil wet while leaving the bottom dry — which trains roots to grow upward toward the surface. Those shallow roots are weaker and more vulnerable.
Deep, infrequent watering encourages roots to grow downward and spread out. That makes for a stronger, healthier plant.
Putting All 4 Hacks Together: A Complete Drainage Setup
You do not need to use all four hacks at once — but combining them gives your plants the best chance of thriving. Here is what a complete setup looks like:
Step 1: Choose a pot with drainage holes (or use the pot-in-a-pot method for decorative containers).
Step 2: Add a thin layer of fine gravel at the bottom, covered with a coffee filter or mesh.
Step 3: Fill with a custom soil blend that includes perlite for aeration.
Step 4: Water only after the chopstick test confirms the soil is dry 2 inches down.
That’s it. Four steps. Four hacks working together to protect your plant’s roots from the inside out.
Best Indoor Plants That Forgive Poor Drainage (For Beginners)
If you are just starting out and still figuring drainage out, these plants are a little more forgiving:
| Plant | Drainage Sensitivity | Why It’s Beginner-Friendly |
|---|---|---|
| Pothos | Low | Adapts to most conditions |
| Snake Plant | Low | Survives drought and overwatering |
| ZZ Plant | Low | Stores water in roots naturally |
| Spider Plant | Medium | Recovers quickly from mistakes |
| Peace Lily | Medium | Shows wilting before damage sets in |
These plants will still benefit from good drainage, but they are less likely to die overnight if something goes wrong.
Plants That Absolutely Need Perfect Drainage
On the other side, these plants have zero tolerance for soggy soil:
| Plant | Why Drainage Is Critical |
|---|---|
| Succulents | Native to dry climates; roots rot almost instantly in wet soil |
| Orchids | Need fast-draining bark mix; standing water kills them |
| Cacti | Same as succulents — desert plants hate moisture |
| Lavender | Needs very gritty soil; wet roots cause rapid decline |
| Rosemary | Mediterranean plant; wilts and rots in heavy soil |
If you own any of these plants, make sure your drainage setup is in place before your next watering session.
Common Drainage Myths — Busted
Let’s clear up a few things that float around the plant care world and cause more harm than good.
Myth #1: “More soil means better support for the plant.” Excessive soil holds excessive moisture. Go with a pot that is only 1–2 inches wider than the root ball.
Myth #2: “Rocks at the bottom always help drainage.” Only fine gravel helps. Large rocks can trap water above them. Always pair gravel with a mesh or filter layer.
Myth #3: “If a plant looks fine, drainage is fine.” Root rot develops underground before you see symptoms above. By the time leaves turn yellow, damage is already advanced.
Myth #4: “Plants need water on a schedule.” Plants need water when they are thirsty — not on a calendar. Always check the soil first.
FAQs About Indoor Plant Drainage
Q: Can I use regular sand from a hardware store to improve drainage? Not recommended. Builder’s sand has very fine particles that can compact over time and actually reduce drainage. Use horticultural sand or coarse grit instead.
Q: Do all indoor plants need drainage holes? Almost all of them, yes. The only exception is plants like lucky bamboo that grow in water, not soil. For everything else, drainage holes are non-negotiable — or you need to use the pot-in-a-pot method.
Q: How often should I repot my plant for better drainage? Most houseplants benefit from fresh soil every 1–2 years. Old soil compacts over time and loses its drainage ability. Even if your plant hasn’t outgrown its pot, new soil can make a big difference.
Q: Is it okay to leave water in the saucer under the pot? For short periods — under 30 minutes — yes. This lets the soil absorb a little extra moisture. But never let water sit in the saucer overnight. Empty it after every watering session.
Q: My plant has root rot already. Can these hacks still help? Yes, but you need to act first. Remove the plant from the pot, trim away any brown or mushy roots with clean scissors, let the roots air-dry for a few hours, and then repot in a fresh, well-draining mix using these drainage hacks. Many plants recover fully with quick action.
Q: How do I know if perlite is actually helping? After watering, time how long it takes for water to drain from the bottom of the pot. With good perlite added to your mix, water should start draining within 30–60 seconds. If it takes several minutes, your mix may need more perlite.
Q: Can I make drainage holes in a pot I already own? Yes. A ceramic drill bit and a steady hand work well for ceramic or terracotta pots. Plastic pots are even easier — a heated nail or simple drill bit does the job. Drill slowly and keep the drill bit cool with a little water.
Wrapping It All Up
Root problems are the number one silent killer of indoor plants. And almost all of them come back to one thing: water that has nowhere to go.
These indoor plants care guides exist because good information should not be buried under jargon or subscription fees. The 4 hacks in this article — the gravel layer trick, the pot-in-a-pot method, custom soil mixing, and the chopstick watering reset — are practical, affordable, and genuinely effective.
You don’t need to be an expert. You just need to give your plant’s roots room to breathe.
Start with one hack today. Maybe swap your fixed watering schedule for the chopstick test. Or mix in some perlite the next time you repot. Small changes add up over time, and before long, your plants won’t just survive — they’ll actually flourish.
Your roots will thank you.