Indoor Plants Care Guides: 10 Easy Ways to be a Good Plant Parent
You have just gained your first plant. It is sitting on your windowsill, and it looks good. Then, after two weeks…it begins to drop. The leaves turn yellow. You panic.
Sound familiar?
Don’t worry. Every plant parent has been there. The positive aspect is that it is not as difficult as one thinks when it comes to keeping houseplants alive. It is only a matter of having the right information at the beginning.
This indoor plants care guide will take you through 10 sound, tested tips that will see you become not only a nervous person who only doubts, but also a confident plant parent. However many succulents you have or a complete shelf of tropical greens, you will see the difference.
Let’s dig in.
The Reason So Many Amateurs Have Problems With Houseplants
The majority of people do not kill plants as a way of being lazy. Because they fall in love they murder plants: in excess of water, excess of fertilizer, excess of worry.
The fact is that plants are living organisms that require certain needs. Plants are healthy when the needs are fulfilled on a regular basis. Plants are injured when they are neglected or exaggerated.
The most prevalent errors that first-time plant owners commit are:
- Scheduling watering rather than monitoring the soil
- Locating plants in improper locations
- Using pots that do not have drainage holes
- Neglecting humidity and temperature needs
All of these, and more, are dealt with in this guide.
Tip 1: Select an Appropriate Plant for Your Space
Be truthful with yourself before purchasing anything.
What is the amount of natural light in your house? Is it a small and dry apartment? Are you someone who travels a lot and forgets to water things? Your answers matter a lot.
Find the Plant to Match Your Lifestyle
In case you are forgetful, plants such as pothos, snake plants, or ZZ plants are drought-tolerant. These plants are able to deal with days of absent watering without drama.
In case you have a bright sunny window, consider succulents, cacti, or aloe vera. These love direct or bright indirect light.
Peace lilies, cast iron plants, or heartleaf philodendrons do well in low-light conditions.
| Your Situation | Best Beginner Plants |
|---|---|
| Low light home | Pothos, Snake Plant, Peace Lily |
| Bright sunny window | Succulents, Aloe Vera, Cacti |
| Forgetful waterer | ZZ Plant, Cast Iron Plant, Jade |
| High humidity space | Ferns, Orchids, Calathea |
| Dry, warm apartment | Cacti, Haworthia, Air Plants |
Starting with the right plant, you have half the battle won.
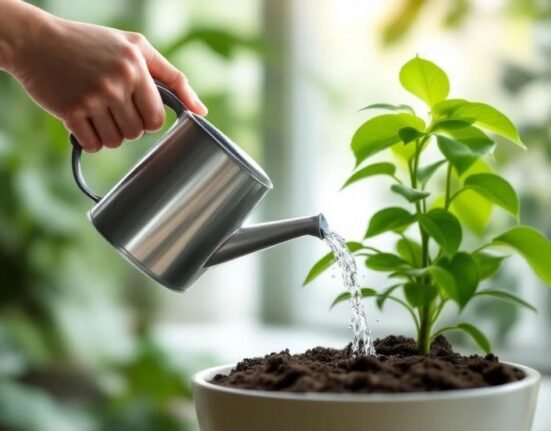
Tip 2: The Golden Rule of Watering
The first cause of death among houseplants is overwatering. The majority of plants die from excessive water than from lack of water.
Here is the golden rule: water the plant, not the schedule.
How to Know When to Water
Put your finger about an inch into the soil. When it becomes dry then it is time to water. If it still feels moist, leave it alone for another day or two.
In the case of succulents and cacti, the soil should be allowed to completely dry between waterings. In the case of tropical plants such as monstera or ferns, the soil should remain slightly moist but never soggy.
The Right Way to Water
When you do water, water thoroughly. Add water gradually until it begins to drain out of the bottom of the pot. This stimulates root growth which becomes deeper and stronger.
Then empty the saucer underneath so the plant is not sitting in standing water.
Quick Watering Checklist:
- Monitor soil moisture prior to watering
- Water deeply, not lightly
- Always empty the drainage saucer
- Room-temperature water should be used where possible
- Cut down on watering during winter months

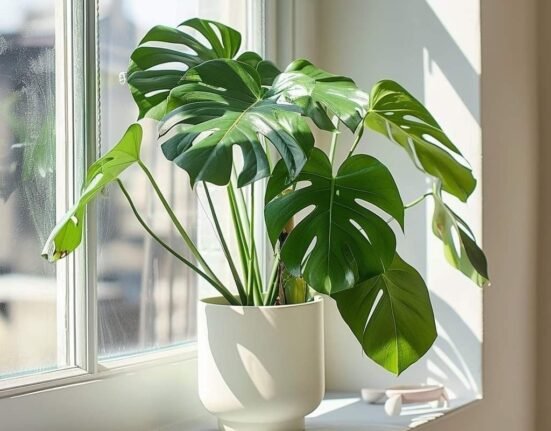
Tip 3: Get the Light Situation Right
Light is food for plants. Lack of sufficient amounts of it prevents plants from generating energy. Excessive direct sunlight will result in sunburn on certain plants.
The Real Meaning of “Indirect Light”
This phrase is used extensively in plant care guides. Indirect light implies that the plant receives brightness without the direct hit of the sun’s rays. A good example is near a window but not in the direct beam of sunlight.
Direct light refers to full sun — normally a south or west-facing window.
Low light refers to a place away from windows or in a room with small windows.
Simple Light Guide
| Light Level | Where It Normally Is | Good Plants |
|---|---|---|
| Bright Direct | South-facing window | Cactus, Succulents |
| Bright Indirect | 2–3 feet from window | Monstera, Pothos, Ficus |
| Medium Light | Several feet from window | Spider Plant, Dracaena |
| Low Light | Darker corners, north rooms | Snake Plant, ZZ Plant |
Keep rotating your plants every one or two weeks so that all sides receive equal light and the plant develops evenly.
Tip 4: Select the Right Pot and Soil
The pot your plant lives in matters more than most beginners realize.
Always Use Drainage Holes
Always avoid planting in a pot that does not have holes at the bottom. Water in such a situation has no place to go and gathers at the roots, leading to root rot. Root rot is usually fatal.
Where you find a pretty decorative pot that has no drainage, use it as a cache pot — place a nursery pot with holes inside it, and simply remove it when you water.
Pick the Right Soil Mix
Not all soil is the same. Regular garden soil is too dense for most houseplants. It compacts easily and does not allow air to reach the roots.
Use a good-quality potting mix. To enhance drainage and airflow, many plants benefit from the inclusion of perlite (small white volcanic stones). For more in-depth guidance on soil types and potting techniques, visit Indoor Plants Guide — a helpful resource for plant parents at every level.
| Plant Type | Best Soil Mix |
|---|---|
| Cacti & Succulents | Cactus mix or potting soil + perlite (50/50) |
| Tropical Plants | Standard potting mix + perlite |
| Orchids | Orchid bark mix |
| Ferns | Moisture-retaining potting mix |
| Air Plants | No soil needed |
Tip 5: Feed Your Plants — But Not Too Much
Plants require nutrients to develop. In nature, these are obtained through the soil ecosystem around them. The nutrients are eventually depleted in a pot.
That is where fertilizer comes in.
When and How to Fertilize
Feed the majority of houseplants during their active growing period — spring and summer. Reduce or stop fertilizing in fall and winter as the natural rate of plant growth slows down.
Use a balanced liquid fertilizer (look for equal numbers like 10-10-10 on the label) once a month during the growing season.
Always follow the instructions on the bottle. An increased amount of fertilizer does not imply increased growth. Over-fertilizing causes fertilizer burn, which damages roots and leaves.
Signs Your Plant Needs Nutrients
- Leaves are pale or yellowish despite good light
- Growth has slowed significantly
- Older leaves are dropping faster than normal
Signs You’ve Over-Fertilized
- White crusty deposits on the soil surface
- Leaf tips turning brown or crispy
- Wilting despite moist soil
When in doubt, fertilize less. A plant that receives inadequate fertilizer will grow slowly. A plant that gets too much can die.
Tip 6: Be Mindful of Temperature and Humidity
The majority of popular houseplants have their origin in tropical or subtropical regions. That tells you something — they prefer warmth and moisture in the atmosphere.
Temperature Tips
Most houseplants thrive in the same temperatures that people are comfortable with: 60°F to 80°F (15°C to 27°C). Keep plants away from:
- Cold drafts from windows in winter
- Heat vents and radiators
- Air conditioning units that blow directly on leaves
Abrupt changes in temperature cause plant stress and may lead to leaf drop.
Humidity Hacks for Your Home
Indoor air is usually very dry, particularly during winter. Here are simple ways to increase humidity for your plants:
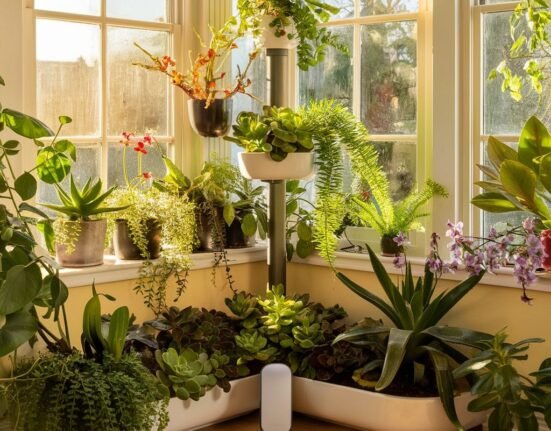
Pebble Tray Method: Fill a tray with pebbles and water. Set the pot on top. As the water evaporates, it adds moisture around the plant.
Grouping Plants Together: Plants release moisture through their leaves. Grouping them together creates a little humid microclimate.
Humidifier: The most effective option. A small humidifier placed near your plants makes a noticeable difference.
Misting: Some individuals mist their plants, but this is only short-lived and may promote fungal problems when done too frequently.
Tip 7: Repot Before It’s Too Late
Plants grow. And when they outgrow their pots, they become root-bound — their roots fill the whole pot with no room to expand. This retards growth and makes watering more difficult.
Signs Your Plant Needs a New Pot
- Roots are growing out of the drainage holes
- Water runs straight through without absorbing
- The plant looks too large for its pot
- Growth has stalled despite good care
How to Repot Without Stressing the Plant
- Select a new pot that is 1–2 inches wider than the one you are using. Do not jump to a pot that is too large — excess soil stays wet for too long.
- Water the plant a day before repotting so that roots will not be stressed.
- Carefully remove the plant from the old pot.
- Brush off some old soil and examine for rotten roots — cut off any black or mushy ones.
- Place new soil at the bottom of the new pot, set the plant in, and fill around the sides.
- Water well and place in indirect light for a few days to recover.
Most plants require repotting only once every 1–2 years.
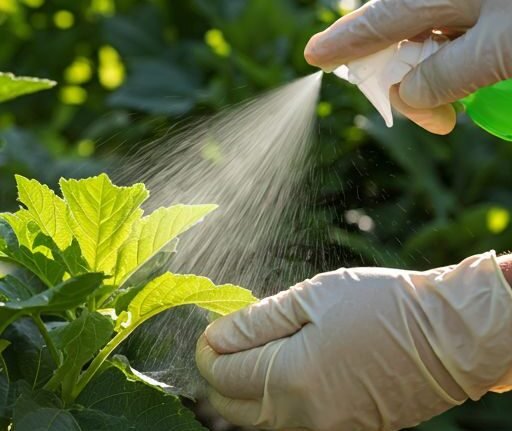
Tip 8: Watch for Pests Before They Take Over
Bugs happen. Plant pests appear even in the cleanest homes. The trick is to catch them early before they spread.
Most Common Houseplant Pests
Fungus Gnats: Tiny flies hovering around the soil. They lay eggs in moist soil. Let the soil dry out between waterings to deal with them.
Spider Mites: Tiny red or brown dots on the leaves, often covered with fine webbing. They love dry conditions. Wipe leaves with a damp cloth and increase humidity.
Mealybugs: White, fluffy-looking clusters in leaf joints. Dab them with rubbing alcohol on a cotton swab.
Scale Insects: Brown bumps on stems and leaves. Scrape them off and treat with neem oil.
Aphids: Small soft insects on new growth. Rinse them off with a gentle spray of water.
According to the Royal Horticultural Society, early identification and consistent monitoring are the most effective strategies for keeping houseplant pests under control.
Your Pest-Fighting Toolkit
| Pest | Best Treatment |
|---|---|
| Fungus Gnats | Dry out soil, sticky traps |
| Spider Mites | Neem oil, damp cloth wipe |
| Mealybugs | Rubbing alcohol + cotton swab |
| Scale | Neem oil, manual removal |
| Aphids | Water spray, insecticidal soap |
Check your plants every week. Turn the leaves over and observe the stems. Timely detection is everything.
Tip 9: Prune and Clean Your Plants Regularly
Plants are not a set-it-and-forget-it situation. They also require regular grooming to stay healthy and look their best.
Why Pruning Matters
Removing dead, yellowing, or damaged leaves achieves two things. First, it keeps the plant looking tidy. Second, it assists the plant in redirecting its energy toward new healthy growth rather than attempting to salvage dying leaves.
Use clean scissors or pruning shears. Always cut just above a leaf node — the point where a leaf meets the stem — in order to encourage bushy new growth.
Wipe Down Those Leaves
Dust collects on plant leaves just like it collects on furniture. A thick layer of dust blocks light from reaching the leaf surface, which reduces photosynthesis.
Wipe leaves with a damp cloth once per month. This keeps them shiny, clean, and efficient.
For plants with lots of tiny leaves (like ferns), give them a gentle shower in the sink or bathtub instead.
Tip 10: Be Patient — Plants Grow on Their Own Timeline
This may be the most difficult thing for new plant parents to follow.
Plants do not grow quickly. The majority of houseplants grow gradually and steadily. New leaves may only appear after weeks. A plant can take months to double in size.
What Patience Looks Like in Plant Care
There is no reason to repot a plant just because it has not grown in three weeks. There is no need to switch its location every few days hoping it will perk up. There is no reason to add more fertilizer thinking it will speed things up.
Instead, create stable conditions and allow the plant to adapt. When you bring a new plant home, it often passes through an adjustment period called transplant shock. It may look sad for a week or two. That is normal.
Keep conditions consistent. Check on it regularly. Make small adjustments where necessary.
The reward for patience? One day you will walk by and notice a brand-new leaf unfurling. That feeling? Worth every minute of waiting.

Common Plant Problems and What They Mean
Here is a quick reference chart for when something looks off:
| What You See | Likely Cause | What to Do |
|---|---|---|
| Yellow leaves | Overwatering or low light | Check soil moisture, move to brighter spot |
| Brown leaf tips | Low humidity or over-fertilizing | Mist the area, flush soil with water |
| Drooping leaves | Underwatering or root rot | Check soil — water if dry, check roots if soggy |
| Leggy/stretched growth | Not enough light | Move closer to a window |
| White spots on soil | Mineral buildup from tap water | Use filtered water, flush soil |
| Dropping leaves | Temperature shock or drafts | Move away from vents and cold windows |
FAQs About Indoor Plant Care
Q: What is the frequency of watering my indoor plants? No single answer is available, as it depends on the plant, the size of the pot, the season, and the humidity of your home. Checking the soil is the best method. If the top inch is dry, water it. If it is still moist, wait.
Q: Which are the simplest indoor plants for beginners? Pothos, snake plants, spider plants, ZZ plants, and peace lilies are all excellent choices. They are forgiving, low-maintenance, and adapt well to typical home conditions.
Q: Why are my plant’s leaves turning yellow? The most likely cause of yellow leaves is overwatering. Allow the soil to dry out more between waterings. Low light, nutrient deficiency, or pests can also cause it — so check all those factors as well.
Q: Do indoor plants need fertilizer? Yes, but only during the growing season (spring and summer). Use a balanced liquid fertilizer once a month. Skip fertilizing in fall and winter.
Q: Can I use tap water for my plants? Most plants are fine with tap water. However, if your water is heavily chlorinated or fluoridated, letting it sit in an open container overnight before using it can help. Some sensitive plants like calatheas prefer filtered or rainwater.
Q: How do I know if my plant needs a bigger pot? When you notice roots poking out of the drainage holes, or the plant dries out at an unusually quick rate after watering, it is time to repot.
Q: Is it normal for plants to lose leaves after being brought home? Yes! Plants often drop some leaves after being moved to a new environment. This is called transplant shock and usually resolves in a week or two once the plant adjusts to its new home.
Q: How do I get rid of those tiny flies near my plants? Those are likely fungus gnats. Let your soil dry out more between waterings — gnats multiply in moist soil — and use yellow sticky traps to catch adults. For serious cases, a soil drench with diluted neem oil works well.
Bringing It All Together
Taking care of indoor plants does not require a green thumb. It requires having the correct information, building consistent habits, and a bit of patience.
You now have the foundation every beginner plant parent needs:
Pick the right plant. Water based on soil, not schedule. Get the light right. Use proper pots and soil. Feed during growing season. Manage temperature and humidity. Repot when needed. Fight pests early. Prune and clean regularly. And above all — be patient.
These are not complex rules. They are simple habits that, once built, become second nature.
Your plants are going to grow. They will sprout new leaves, climb up trellises, and spill beautifully over the edges of their shelves. And when they do, you will know exactly what you did to make that happen.
Start with one plant. Get comfortable. Then grow your collection one leaf at a time.
This indoor plants care guide is designed to grow with you. Bookmark it, come back to it, and share it with every new plant parent you know.