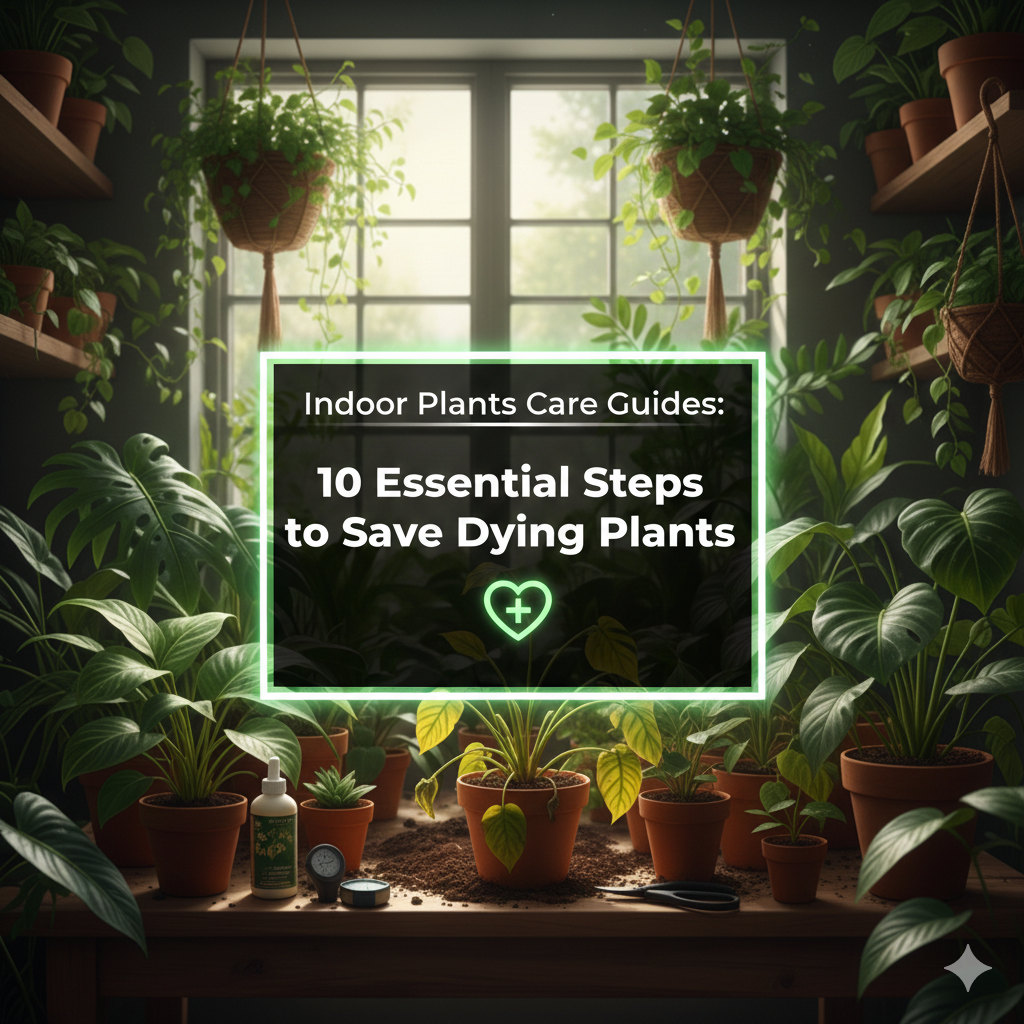
Tips to Save Your Dying Plants
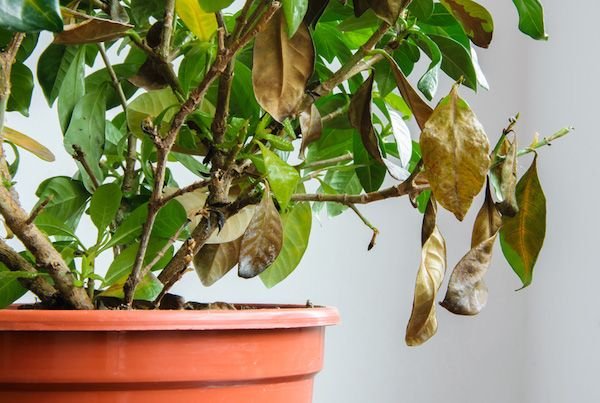
You walk by your favorite plant and see something alarming. The leaves are yellow. The stems are drooping. Soil appears bone dry — or, worse, soggy and smelling.
Your plant is dying.
Well, here’s the good news: Most dying plants can be revitalized. You just need to know what you’re after and what to do next.
This guide takes you step by step through 10 essential things you need to do to get your indoor plants looking their best. Whether you’re a novice or have decades of experience keeping plants, these tips are sensible, time-tested, and easy to follow.
Let’s get started.
Why Things Go Wrong for Indoor Plants in the First Place
Before you can solve something, you first need to have a clear view of what caused it.
Indoor plants kick the bucket for a few common reasons. Often, it isn’t bad luck — it’s something you can control.
Some of the most common suspects:
| Cause | Symptoms | Care |
|---|---|---|
| Overwatering | Yellow leaves, mushy stems, soggy soil | Hold off on water for a while |
| Underwatering | Dry soil, crispy brown leaf tips | Quench your plant’s thirst |
| Too much sun | Scorch marks on leaves | Find a shadier spot |
| Too little light | Leggy growth with light green leaves | Move to better light |
| Wrong temps | Spotting or browning in random places | Adjust placement |
| Pests | Tiny bugs showing up | Treat immediately |
| Root rot | Reeking smell from soil | Inspect and treat roots |
| Poor drainage | Poor growth, soggy soil | Improve drainage |
You can respond quickly once you identify the signs. The earlier you see the problem, the greater your chances of saving your plant.
Step 1: Stop and Look Before You Touch a Thing
The most common mistake people make is running around “fixing” a plant without knowing what the problem is.
Take a moment. Observe.
Check the leaves. Do they look yellow, brown, wilted, or spotted? Each of the symptoms points to a different problem.
Check the soil. Poke your finger in about one inch deep. Does it look dry and pulling away from the pot? Or is it damp, compacted, and smelly?
Check the roots. Carefully tip your pot and check the bottom drainage holes. If you observe mushy roots that are dark, this is root rot.
Check for pests. Be sure to check under leaves and along the stems. Spider mites leave tiny webs. Fungus gnats fly around over the soil. Mealybugs resemble little cottony groups.
Write down what you notice. This allows you to monitor what’s going on and select the appropriate fix.
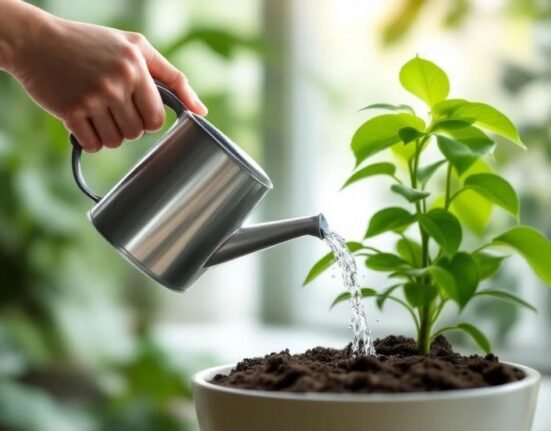
Step 2: Watering Right — It’s Not as Simple as You Think
Watering is where most plant parents trip up.
A plant can be killed by too much water just as easily as too little. And, surprisingly enough, the No. 1 killer of indoor plants is overwatering.
How to Know When to Water
Don’t water on a schedule. Water based on the soil.
Stick a finger in the soil an inch or two. If it still feels damp, wait. If it is dry, it’s time to water.
For succulents and cacti, let the soil go completely dry before watering again.
For tropical plants — like pothos and peace lilies — water when the top inch of soil is dry.
How to Water Properly
Water slowly and evenly until the water pours out of the holes on the bottom. This ensures the entire root system receives water.
Then empty the saucer. Do not leave your plant standing in water — that will lead to root rot in a hurry.
Quick Tip: Use room-temperature water. A tropical plant may react to cold water by being shocked or suffer leaf damage.
Step 3: Check the Drainage — Your Pot Matters More Than You Think
A lovely pot without holes will be a death trap for plants.
Without drainage, water accumulates at the bottom and smothers the roots. And even if you water it just right, inadequate drainage negates it all.
What to Do If Your Pot Doesn’t Have Holes
You have two options:
Option 1: Use the pot as a decorative cover. Place your plant in a plain nursery pot with drainage holes inside the decorative one. Just remove it when watering.
Option 2: Drill holes in the bottom if the pot material allows it.
Also make sure existing holes aren’t blocked. Compact soil or roots can clog drainage over time. Loosen them with a pencil or chopstick.
Step 4: Resolve Root Rot Before It Entirely Kills the Plant
Root rot is serious — but not always fatal.
It occurs when roots spend too much time in water. Fungus grows, roots turn black and mushy, and they can no longer absorb nutrients.
How to Save a Plant with Root Rot
Step 1: Take the plant out of its pot.
Step 2: Gently shake off the old soil.
Step 3: Wash the roots under a stream of lukewarm water.
Step 4: Cut away all black, brown, or mushy roots with clean scissors or pruning shears. Keep only the healthy white or tan ones.
Step 5: Allow roots to air dry for 30–60 minutes.
Step 6: Repot in fresh, well-draining soil. Don’t reuse the old soil — it may still contain fungus.
Step 7: Wait 3–4 days before watering again.
This gives the plant a fresh start. Most plants recover within a couple of weeks.
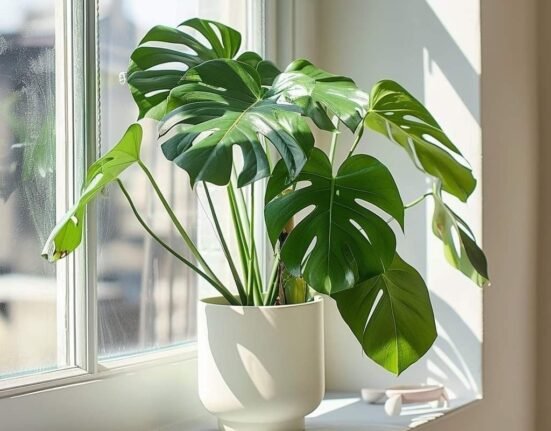
Step 5: Give Your Plant the Right Amount of Light
Light is food for plants. Too little and they starve. Too much direct sun and they fry.
The vast majority of indoor plants fall into one of these three light categories:
| Light Need | Ideal Placement | Example Plants |
|---|---|---|
| Low light | Far from windows, dark corners | Snake plant, ZZ plant, cast iron plant |
| Medium/indirect light | Near a window but not in direct sun | Pothos, peace lily, philodendron |
| Bright direct light | South or west-facing window | Cacti, succulents, aloe vera |
Signs Your Plant Needs More Light
- Leaves are turning pale or yellow
- Stems are growing long and spindly toward the window
- Growth has slowed or stopped completely
Signs Your Plant Is Getting Too Much Light
- Brown, crispy patches on leaves
- Bleached or washed-out color
- Soil drying out extremely fast
When changing the light situation of your plant, move it in slow steps. The plant can get shocked by a sudden transition from low to bright light.
For more plant-specific light and care advice, visit Indoor Plants Guide — a helpful resource for all levels of plant parents.
Step 6: Deal with Pests Quickly and Completely
Pests spread fast. All it takes is one infested plant and your whole collection could be in trouble if you’re not careful.
The moment you notice pests, isolate the affected plant. Move it away from your other plants immediately.
Most Common Indoor Plant Pests
Spider mites — Tiny red or brown specks. Look for fine webbing under leaves. Wipe leaves down with a damp cloth and spray lightly with neem oil.
Mealybugs — White, cottony masses along stems and leaf joints. Dab with rubbing alcohol on a cotton swab to remove them.
Fungus gnats — Small flies hovering around the soil. They lay eggs in moist soil. Let the soil dry out more between waterings and use yellow sticky traps.
Scale insects — Brownish bumps on stems. Carefully scrape off and treat with insecticidal soap.
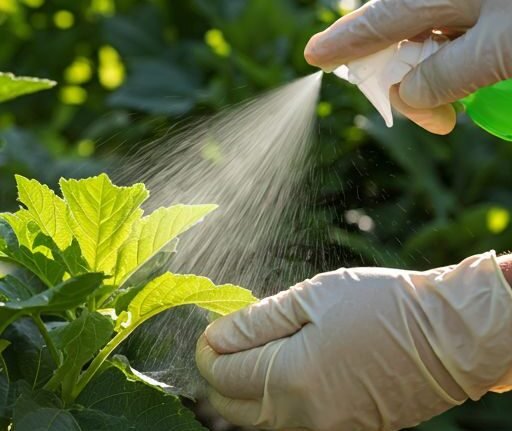
A Simple Pest Treatment Routine
Mix 1 tablespoon of neem oil with 1 teaspoon of mild dish soap in 1 liter of water. Spray all leaf surfaces, including undersides. Repeat every 5–7 days for 3–4 weeks.
According to the Royal Horticultural Society, neem oil is one of the most effective organic treatments for common houseplant pests and is safe for use around people and pets.
Step 7: Check the Soil and Repot When Needed
Old, compacted soil loses its ability to retain nutrients and drain properly. It gradually suffocates your plant’s roots.
Signs It’s Time to Repot
- Roots are growing out of the drainage holes
- The plant dries out extremely quickly after watering
- You notice roots circling tightly around the root ball
- The plant is too big for its pot and keeps falling over
How to Repot Without Stressing the Plant
Choose a pot only 1–2 inches larger in diameter than the current one. Going too big encourages overwatering.
Use fresh potting mix suited to your plant type. Succulents need gritty, fast-draining mix. Tropicals do best in a rich, slightly moisture-retaining soil.
Water lightly after repotting and place the plant in indirect light for a week. This reduces transplant shock.
Step 8: Feed Your Plant — But Don’t Overdo It
Plants require nutrients to grow and recover. But fertilizing a sick or stressed plant may only make things worse.
Wait until your plant shows some signs of recovery before fertilizing.
When to Fertilize
- During the active growing season (spring and summer)
- When the plant is healthy and producing new leaves
- 4–6 weeks after repotting into fresh soil
When NOT to Fertilize
- In fall and winter when most plants are resting
- When the plant is severely wilted or diseased
- Right after repotting
Use a balanced, water-soluble fertilizer at half the recommended strength. This reduces the risk of fertilizer burn, which causes brown leaf tips and crispy edges.
Step 9: Keep Temperature and Humidity in Check
The majority of houseplants are native to the tropics. They crave warmth and humidity — two things that are often lacking in most homes.
Ideal Temperature Range for Most Indoor Plants
Keep houseplants in a temperature range of 60°F to 80°F (15°C to 27°C).
Avoid placing plants near:
- Air conditioning vents
- Heating vents or radiators
- Cold drafts from windows and doors
- Exterior walls in winter
How to Boost Humidity at Home
Misting: Mist leaves lightly with water every 1–2 days. This works, but you have to do it consistently.
Pebble tray: Fill a shallow tray with pebbles and add water. Set the pot on top. As the water evaporates, it adds humidity around the plant.
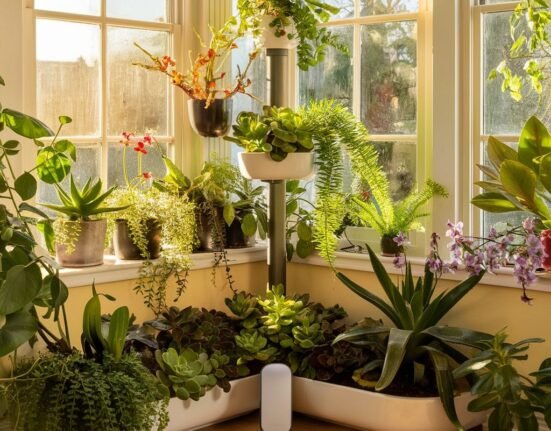
Grouping plants: Place plants close together. They naturally release moisture and create a mini humid environment.
Humidifier: The most effective method. Keeping a small humidifier near your plant collection can make a noticeable difference.
Step 10: Prune the Dead Parts and Be Patient
Pruning feels scary. It looks like you’re making things worse. But clearing away dead, dying, or diseased parts actually helps the plant recover more quickly.
Dead leaves and stems steal energy from the plant. Trimming them redirects that energy to healthy new growth.
What to Cut
- Yellow or brown leaves that won’t recover
- Stems that are mushy, black, or rotting
- Overly long, leggy stems that are weakening the plant
- Dead flowers to encourage new blooms
How to Prune Without Causing Damage
Always use clean, sharp scissors or pruning shears. Dirty tools can spread disease from plant to plant.
Cut close to the base of the stem but don’t cut into the main stem. After pruning, dab the cuts with a little powdered cinnamon — it acts as a natural antifungal agent.
Once you’ve pruned, watered correctly, and addressed the root cause of the problem — wait. It typically takes 2–6 weeks for most plants to visibly improve. Some take longer.
Don’t give up too soon.
A Quick Recovery Checklist
Use this checklist any time a plant is struggling:
| Action | Done? |
|---|---|
| Identified the main problem | ☐ |
| Adjusted watering schedule | ☐ |
| Checked and fixed drainage | ☐ |
| Inspected and treated roots | ☐ |
| Moved plant to correct light spot | ☐ |
| Treated pests if present | ☐ |
| Repotted if soil was compacted or old | ☐ |
| Held off fertilizing until recovery | ☐ |
| Adjusted temperature and humidity | ☐ |
| Pruned dead leaves and stems | ☐ |
The Most Common Mistakes Plant Parents Make
Even experienced plant lovers fall into these traps:
Watering on a fixed schedule. Plants don’t know what day it is. Always check the soil first.
Using the wrong pot size. Too big means water sits in soil the roots can’t reach. Too small and the plant becomes root-bound and dries out too quickly.
Ignoring pests until it’s bad. Small infestations are simple to treat. A large one can kill a plant in days.
Fertilizing a sick plant. This adds stress, not nutrients. Fix the root problem first.
Moving plants constantly. Plants need time to adjust to new locations. Too much moving causes unnecessary stress and leaf drop.
FAQs About Saving Dying Indoor Plants
Can a plant with all yellow leaves be saved?
Yes, in many cases. Yellow leaves often mean overwatering. Remove the yellow leaves, inspect the roots, retune your watering practices, and let the plant recover. It’s a good sign if the roots are still healthy and white.
How long does a dying plant take to recover?
It all depends on how stressed the plant is and what the problem was in the first place. The majority of plants recover within 2–6 weeks after the issue is resolved. Severely damaged plants may require 2–3 months.
Do I need to water more when a plant is dying?
Not necessarily. Watering more only makes sense if the plant is underwatered. If it’s dying from overwatering or root rot, more water makes things worse. Always diagnose the problem first.
Is it safe to use neem oil on all indoor plants?
Neem oil is safe for most common indoor plants. However, some sensitive plants, such as ferns and certain herbs, may not fare so well. Test on one leaf first and wait 24 hours before treating the entire plant.
What’s the quickest way to revive a droopy plant?
If the soil is bone dry, deeply water the plant — set the pot in a shallow basin of water for 20–30 minutes and allow the roots to absorb moisture from the bottom. If the soil is already wet, root rot may be to blame, and repotting is the quickest solution.
Can you save a plant with root rot?
Yes. If you catch it early and at least some roots are still healthy and white, you can cut away everything that’s rotted, repot in fresh soil, and save the plant. Move fast — the longer root rot goes untreated, the worse it gets.
How often should you check plants for pests?
Do a quick check every 1–2 weeks. Look under leaves, along stems, and at the soil surface. Early detection makes pest treatment much easier and more effective.
Wrapping It All Up
Saving a dying plant isn’t magic. It’s a process.
You look a little closer, figure out what’s not working, and fix one thing at a time. Most plants are much hardier than people give them credit for. With proper care and a touch of patience, you can nurse a struggling plant back to health.
That’s exactly why indoor plants care guides exist — to make you feel confident, not overwhelmed, when something goes wrong.
So the next time your plant starts to look rough, don’t toss it. Go through these 10 steps. Give it time. You might be surprised how much life is still left in those leaves.
Sonnet 4.6